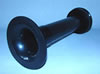
Ãëàâíîå àóäèî-ìåíþ N-AUDIO
Àóäèî àêñåññóàðû
ôàçîèíâåðòîðû Precision Port
Òðóáà ôàçîíèíâåðòîðà ñèììåòðè÷íàÿ, ïåðåìåííîé äëèíû - Precision Port
Èíñòðóêöèè ïî óñòàíîâêå ôàçîèíâåðòîðîâ
ïåðåìåííîé äëèíû

Installation Instructions
 

2" Precision Ports
INSTALLATION PROCESS

1. Calculate length of port needed:

2. Determine proper speaker & port placement before cutting any holes. The Precision Port™ should be placed at least one port diameter away from any inside walls, if possible.

3. Once placement has been determined cut the proper size hole. We have supplied a cut diagram to help with this step. Follow the instructions on the cut diagram for proper fit.

4. Trim center tube to 4" shorter than Lv from step one.

5. The Precision Port™ should be 1" longer than Lv when assembled.

6. If you want to use screws to attach the port to the enclosure use the guide marks on the back of the outside flare. The screw holes are numbered with a 3 or 4 for the number of screws you would like to use.

7. When the length has been achieved the Precision Port™ can be glued together using ordinary ABS adhesive or similar type glue. Once pieces are assembled with ABS adhesive, pieces can not be taken apart.

Assemble the Precision Port™ in the following manner:

1. Attach connecting rings to flared ends.
2. Slide flared ends, with connecting rings attached, over tube section.

8. Insert the Precision Port™ into enclosure and secure with adhesive and/or screws.


3" and 4" Precision Ports
INSTALLATION PROCESS

1. Calculate length of port needed:

2. Determine proper speaker & port placement before cutting any holes. The Precision Port™ should be placed at least one port diameter away from any inside walls, if possible.

3. Trim center tube to 5" shorter than Lv from step one.

4. The Precision Port™ should be 1" longer than Lv when assembled.

5. Once placement has been determined cut the proper size hole. (Cut hole to the diameter of the flare side of the inside flare)

6. When the length has been achieved the Precision Port™ can be glued together using ordinary ABS adhesive or similar type glue. Once pieces are assembled with ABS adhesive, pieces can not be taken apart.

Assemble the Precision Port™ in the following manner:

1. Attach connecting rings to flared ends.
2. Slide flared ends, with connecting rings attached, over tube section.

7. Insert the Precision Port™ into enclosure and secure with screws, holes are drilled for #6 drywall screws for a flush appearance.

©2006 Precision Sound Products

 
Òðóáà ôàçîíèíâåðòîðà ñèììåòðè÷íàÿ, ïåðåìåííîé äëèíû - èíñòðóêöèÿ ïî óñòàíîâêå
 

â íà÷àëî

 
ÀÓÄÈÎ ÄÀÊÈ ÀÊÓÑÒÈ×ÅÑÊÈÅ ÑÈÑÒÅÌÛ ÏÎÈÑÊ ÏÎ ÑÀÉÒÓ ÊÎÍÒÀÊÒÛ
ÀÓÄÈÎ-ÑÑÛËÊÈ ÄÈÍÀÌÈ×ÅÑÊÈÅ ÃÎËÎÂÊÈ ÑÏÐÀÂÎ×ÍÈÊ ÊÎÍÑÒÐÓÊÖÈÈ ÀÑ
N-AUDIO PRODUCTS ÀÂÒÎÀÊÓÑÒÈÊÀ ÑÒÀÒÜÈ ÃËÀÂÍÎÅ ÌÅÍÞ
 
Ïðîôåññèîíàëüíàÿ àêóñòèêà îò N-AUDIO. Âûñîêîêà÷åñòâåííàÿ çâóêîòåõíèêà êëàññà HI-FI. 20-ëåòíèé îïûò ðàçðàáîòîê, èçãîòîâëåíèÿ è âíåäðåíèÿ
Copyright © n-audio.com 2004
Designed by BeStudio © 2008